环境准备
虚拟机一台 :
centos8
IP:172.16.183.18
关闭防火墙 ( 为了测试 )
systemctl status firewalld.service( 查看防火墙状态 )
systemctl stop firewalld.service ( 关闭防火墙 ) systemctl start firewalld.service ( 开启防火墙 ) systemctl disable firewalld.service ( 禁止防火墙自启动 ) systemctl enable firewalld.service ( 防火墙随系统开启启动 )# 一次安装 4 个插件
yum -y install gcc pcre pcre-devel zlib zlib-devel openssl openssl-devel# 一次安装如果有问题 , 可以试一下分开安装 ( 上面命令执行成功了就就无需执行以下命令了 )
yum install gcc-c++ yum install -y pcre pcre-devel yum install -y zlib zlib-devel yum install -y openssl openssl-devel安装的插件的作用
1.gcc 可以编译 C,C++,Ada,Object C 和 Java 等语言 ( 安装 nginx 需要先将官网下载的源码进行编译 , 编译依赖 gcc 环境 )
2.pcre pcre-devel pcre 是一个 perl 库 , 包括 perl 兼容的正则表达式库 ,nginx 的 http 模块使用 pcre 来解析正则表达式 , 所以需要安装 pcre 库
3.zlib zlib-devel zlib 库提供了很多种压缩和解压缩方式 nginx 使用 zlib 对 http 包的内容进行 gzip, 所以需要安装
4.openssl openssl-devel OpenSSL 是一个强大的安全套接字层密码库 , 囊括主要的密码算法、常用的密钥和证书封装管理功能及 SSL 协议 , 并提供丰富的应用程序供测试或其它目的使用。
5.nginx 不仅支持 http 协议 , 还支持 https( 即在 ssl 协议上传输 http), 所以需要在 Centos 安装 OpenSSL 库
安装步骤
安装 nginx
方法一、直接下载.tar.gz 安装包
https://nginx.org/en/download.html
方法二、使用 wget 命令下载 ( 推荐 )。确保系统已经安装了 wget, 如果没有安装 , 执行 yum install wget 安装。
(注意 : 本示例使用方法一)
下载包
wgte https://nginx.org/download/nginx-1.21.6.tar.gz解压
tar xvf nginx-1.21.6.tar.gz cd nginx-1.21.6配置 ( 带有 https 模块 )
./configure --prefix=/usr/local/nginx --with-http_stub_status_module --with-http_ssl_module编译和安装
编译 :make 安装 :make install查看安装路径
whereis nginx注意 :nginx 的安装路径并非你的解压路径

设置开机启动
编辑服务文件
vim /lib/systemd/system/nginx.service[Unit] Description=nginx service After=network.target [Service] Type=forking ExecStart=/usr/local/nginx/sbin/nginx ExecReload=/usr/local/nginx/sbin/nginx -s reload ExecStop=/usr/local/nginx/sbin/nginx -s stop PrivateTmp=true [Install] WantedBy=multi-user.target说明 :
Description: 描述服务
After: 描述服务类别
[Service] 服务运行参数的设置
Type=forking 是后台运行的形式
ExecStart 为服务的具体运行命令
ExecReload 为重启命令
ExecStop 为停止命令
PrivateTmp=True 表示给服务分配独立的临时空间
注意 :[Service] 的启动、重启、停止命令全部要求使用绝对路径
[Install] 运行级别下服务安装的相关设置 , 可设置为多用户 , 即系统运行级别为 3
保存退出
加入开机自启动
systemctl enable nginx.service取消开机自启动
systemctl disable nginx.service服务的启动 / 停止 / 刷新配置文件 / 查看状态
# 启动 nginx 服务 systemctl start nginx.service #停止服务 systemctl stop nginx.service #重新启动服务 systemctl restart nginx.service #查看所有已启动的服务 systemctl list-units --type=service #查看服务当前状态 systemctl status nginx.service #设置开机自启动 systemctl enable nginx.service # 停止开机自启动 systemctl disable nginx.service nginx.conf https 配置
server {listen 443 ssl; server_name localhost; ssl_certificate cert.pem;# 根证书地址 ( 默认把证书放在 conf 目录 ) ssl_certificate_key cert.key;# 证书秘钥 ( 默认把证书放在 conf 目录 ) ssl_session_cache shared:SSL:1m; ssl_session_timeout 5m; ssl_ciphers HIGH:!aNULL:!MD5; ssl_prefer_server_ciphers on; location / { root html; index index.html index.htm;} }将 http 重定向 https
server {listen 80; server_name localhost; #将请求转成 https rewrite ^(.*) https://$server_name$1 permanent; }查看 nginx 进程命令
ps aux | grep nginxhtml 设置编码
html 文件显示出来乱码 , 一般在文件头中设置网页编码即可 , 加入 <meta charset="utf-8">
配置文件 nginx.conf 看 ip: 端口

注意 : 安装在虚拟机或服务器里面需要用服务器的本机 ip 访问 !
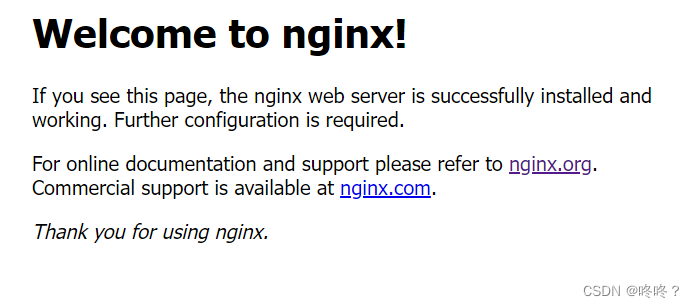
访问 ip:port

启动成功 !!!
附件 :
一般 nginx 在你的解压路径里面是没有 sbin 路径的 ,sbin 在安装路径里面 , 如果想在解压路径启动 nginx 需做如下操作 :
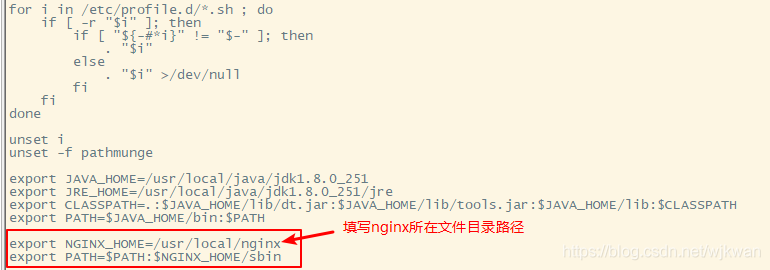
(1) 配置 Nginx 环境变量 :
执行 vi /etc/profile 命令 ,shift + G跳到最后 , 按 I 进入编辑模式将如下代码添加到最后
export NGINX_HOME=/usr/local/nginx export PATH=$PATH:$NGINX_HOME/sbin
Esc 退出编辑模式 , 按 shift+: 冒号 ,wq 保存退出。
执行 source /etc/profile 命令重新加载配置文件
这时候就会出现新的文件夹 objs, 启动文件就会出现在这个文件夹下面 , 然后进入到此文件夹下
启动 nginx:
执行 ./nginx
ps -ef | grep nginx查看是否有 Nginx 进程

到此结束 !!!!
原文链接:https://blog.csdn.net/qq_50523945/article/details/131071407